Many SmartCanvas products include text or headlines that you may be able to edit. You may also be able to add your own text or headlines.
Note: A headline is text in a larger size that comes in a fixed style.
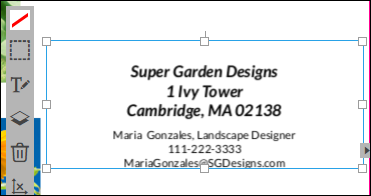
When a product includes text, click it to find out if you can change it. Text is displayed in a box with a toolbar to the side. The editing options that are available depend on the product.
Do any of the following (depending on the options available to you):
● Re-size or move the text box
● Add or change the background (fill) color
● Arrange the text in relation to other objects (move forwards or backwards)
● Click
 to delete the selected text box.
You may be able to change the text itself. What you can do when editing text depends on the product. For example, you may be able to select a pre-defined style and/or select a size and color for the text. You can apply different formats to different text in the same text box.
Note: If you click a headline, you can edit the text, but not change its style. Headlines come in a fixed style.
1. Click
the text you want to change and then click  .
.
Notes:
●
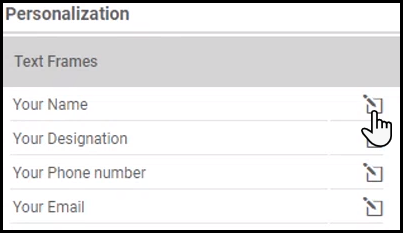
If text frames are available
in the Personalization column, then click  to open the Text editor window for the appropriate text field.
●
If the text is a headline, clicking just allows
you to change the text itself since you cannot change the style of a headline.
The options that are now available to you depend on the product. A Text editor window may open. This may either include a list of styles you can select and/or have a toolbar of formatting options. Alternatively, you may just get a toolbar with the text shown below it (not in a full window).
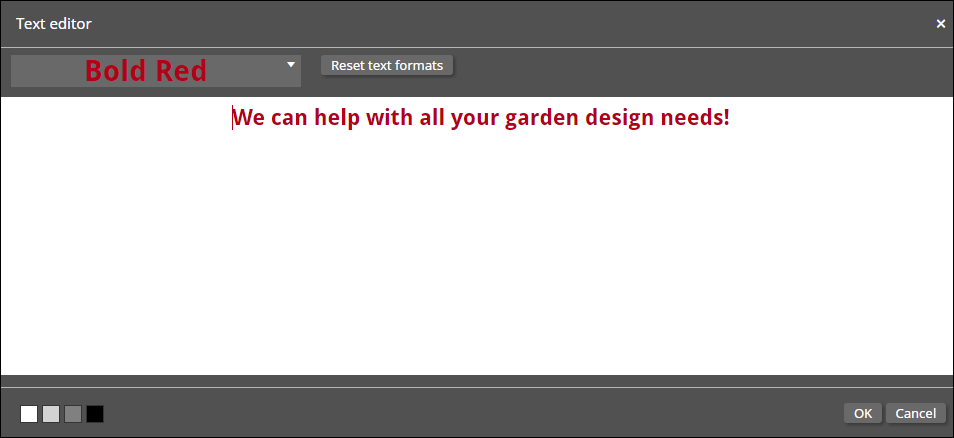
3. If
a Text editor window with style selections (no toolbar) opens after you
click :
a. If necessary, edit the text or add more text.
Warning: If the text includes form fields in the format [[FormField1]], [[FormField2] do not delete these. These are placeholder fields for the form you complete when personalizing the product. You can, however, format this text.
b. Click the paragraph you want to format. (A paragraph may be a single line.)
c. Select one of the pre-defined styles.
d. To apply a different style to a different paragraph, click the paragraph and select a style for it.
e. By default, the background for the text is white. Depending on the text color, change the background by clicking one of the buttons at the bottom of the Text editor window. For example, if you have white or light-colored text, select a dark background for readability.
f. If you dislike your choices, click Reset text formats to start again.
g. When you are satisfied with the formatting, click OK.
4. If
a Text editor window with a toolbar opens after you click :
a. If necessary, edit the text or add more text.
Warning: If the text includes form fields in the format [[FormField1]], [[FormField2] do not delete these. These are placeholder fields for the form you complete when personalizing the product. You can, however, format this text.
b. Select the text you want to format.
c. Change the font or color of the text, its size, the spacing between lines, or the justification.
d. To format other text differently, select the text and make your selections.
e. By default, the background for the text is white. Depending on the text color, change the background by clicking one of the buttons at the bottom of the Text editor window. For example, if you have white or light-colored text, select a dark background for readability.
f. If you dislike your choices, click Reset text formats to start again.
g. When you are satisfied with the formatting, click OK.

Note: You may be able to select a style for text, as well use a toolbar to format text.
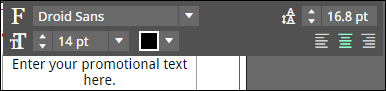
5. If
a small window (not the
Text editor window) opens after you click :
a. If necessary, edit the text or add more text.
b. Select the text you want to format and use the toolbar to change its font, size, color, or justification, or the spacing between lines of text.
c. Repeat step 4b for any other text you want to format differently.
d. Click somewhere else on the screen to close this window.
When you add text to a product (assuming the product allows it), you get a choice of styles. When you add a headline, the style is fixed.
To add text
1. Click
 on the SmartCanvas toolbar. A text box with Enter
your text here is added.
on the SmartCanvas toolbar. A text box with Enter
your text here is added.
2. Drag the text box where you want it.
3. Click
the text box and click .
4. Replace Enter your text here with your own text.
5. Select the text, select a style for it, and click OK.
6. Make other changes to the text as necessary, for example, add a border.
To add a headline
1. Click
 on the SmartCanvas toolbar. A text box with Enter
your text here is added.
on the SmartCanvas toolbar. A text box with Enter
your text here is added.
2. Drag the text box where you want it.
3. Click
the text box and click .
4. Replace Enter your text here with your own text. (No formatting changes are possible.)
5. Make other changes to the headline as necessary, for example, add a border.
See also
● Working with objects in SmartCanvas products
● Working with images in SmartCanvas products
● Working with shapes in SmartCanvas products
● Working with QR codes in SmartCanvas products